WordPress

WordPress is a powerful and flexible content management system that allows users to create, manage, and publish websites, blogs, and other digital content.
With the WordPress app in Make, you can manage posts, categories, comments, media, users, tags, and taxonomies in your WordPress account.
Requirements
To use the WordPress app in Make, you must have a WordPress account with the Make Connector plugin enabled.
Connect WordPress and Make
To get started, you must first create a connection between WordPress and Make, allowing the two services to communicate.
To create the connection, you need to:
Install the Make Connector plugin in WordPress
Before you create the connection in Make, you should first install the Make Connector plugin.
To install the Make Connector plugin:
Go to the Make Connector plugin page in WordPress and click Download for the Make Connector plugin.
Log in to your WordPress Admin and click Plugins.
Click Add Plugins, and then Upload Plugin next to it.
Browse and select the plugin zip file that you downloaded in step 1 above.
Click Install now.
After the installation is complete, click Activate Plugin.
You can also install the plugin in another way:
Log in to your WordPress Admin and click Plugins.
Click Add Plugins.
Find the Make Connector plugin.
Click Install now next to it.
After the installation is complete, click Activate Plugin.
You have now successfully installed the Make Connector plugin. You will see a new item called Make in the admin menu on the left. There, you can find your API Key and select which custom fields you want to be visible in the REST API response.
Obtain your API key in WordPress
To obtain your API key from your WordPress account:
Log in to your WordPress account.
In the left sidebar, click the Make Connector plugin.
In the General Settings tab, click Reveal next to the API key.
In this tab, you can also:
- Click Regenerate to get a new API key, if needed.
- Enable granular API permissions to associate the API key with specific actions.
- Download or delete the Make Connector plugin log.
Copy the API key value and store it in a safe place.
You will use this value in the API key field in Make.
Create the connection in Make
Once you have installed the Make Connector plugin and obtained the WordPress API key, you're ready to create the connection in Make. To create the connection:
Log in to your Make account, add a WordPress module to your scenario, and click Create a connection.
Optional: In the Connection name field, enter a name for the connection.
In the WordPress REST API base url field, enter the base URL of your WordPress site's API, e.g.,https://your-wordpress-site.com/wp-json/.
If you encounter a 404 error with the REST API base URL, see the Troubleshooting section below.
In the API Key field, enter the API key you copied from your WordPress account.
Click Save.
You have successfully established the connection. You can now edit your scenario and add more WordPress modules. If your connection requires reauthorization at any point, follow the connection renewal steps herehere.
Currently, our plugin is not optimized to run with large websites. If you receive a memory size exhausted error, we recommend increasing the PHP memory limit beyond the default 512MB.
Custom fields
To work with the custom fields you want to include in your module output, you need to activate them in the Make Connector plugin.
To do that:
Ensure that the Make Connector plugin is installed.
In the left sidebar, click Make > Custom API Fields.
Select the required custom fields you want to include in the module output.

Click Save Settings.
The selected custom fields are now available in the module output.
Security settings
You can also configure certain security settings in WordPress that will apply to your Make integration.
To do that:
Log in to WordPress Admin.
In the left sidebar, click Make > Security. Enable any of the following options as needed:
- Security Logging: logs security-related events, e.g., rate-limiting violations and permission denials.
- Content Sanitization: sanitizes content, e.g., removes potentially harmful HTML tags and attributes from incoming content.
- Rate Limiting: establishes the maximum number of API requests per minute.
- Request Size Limits: restricts the maximum size of API request payloads.
- File Upload Security: enforces strict file validation for uploads by listing acceptable file extensions.
To apply the changes, click Save Settings.

Enabling these options will help maintain a secure and stable integration environment.
WordPress modules
After connecting to the WordPress app, you can use the following types of modules to build your scenarios.
Templates
You can look for WordPress templates in Make's template gallery, where you'll find thousands of pre-created scenarios.
Troubleshooting
Resolve common issues related to the WordPress app in this section.
WordPress REST API 404 error
If you encounter a 404 error when entering your REST API base URL, it's likely due to your WordPress Permalinks being set to Plain, which can disable the REST API.
To fix it:
Go to your WordPress Admin Dashboard:https://your-wordpress-site.com/wp-admin
Replace your-wordpress-site.com with your actual domain name whenever it appears in this section.
In the left sidebar, click Settings > Permalinks:
- Instead of Plain, select Post name.
- Click Save Changes.
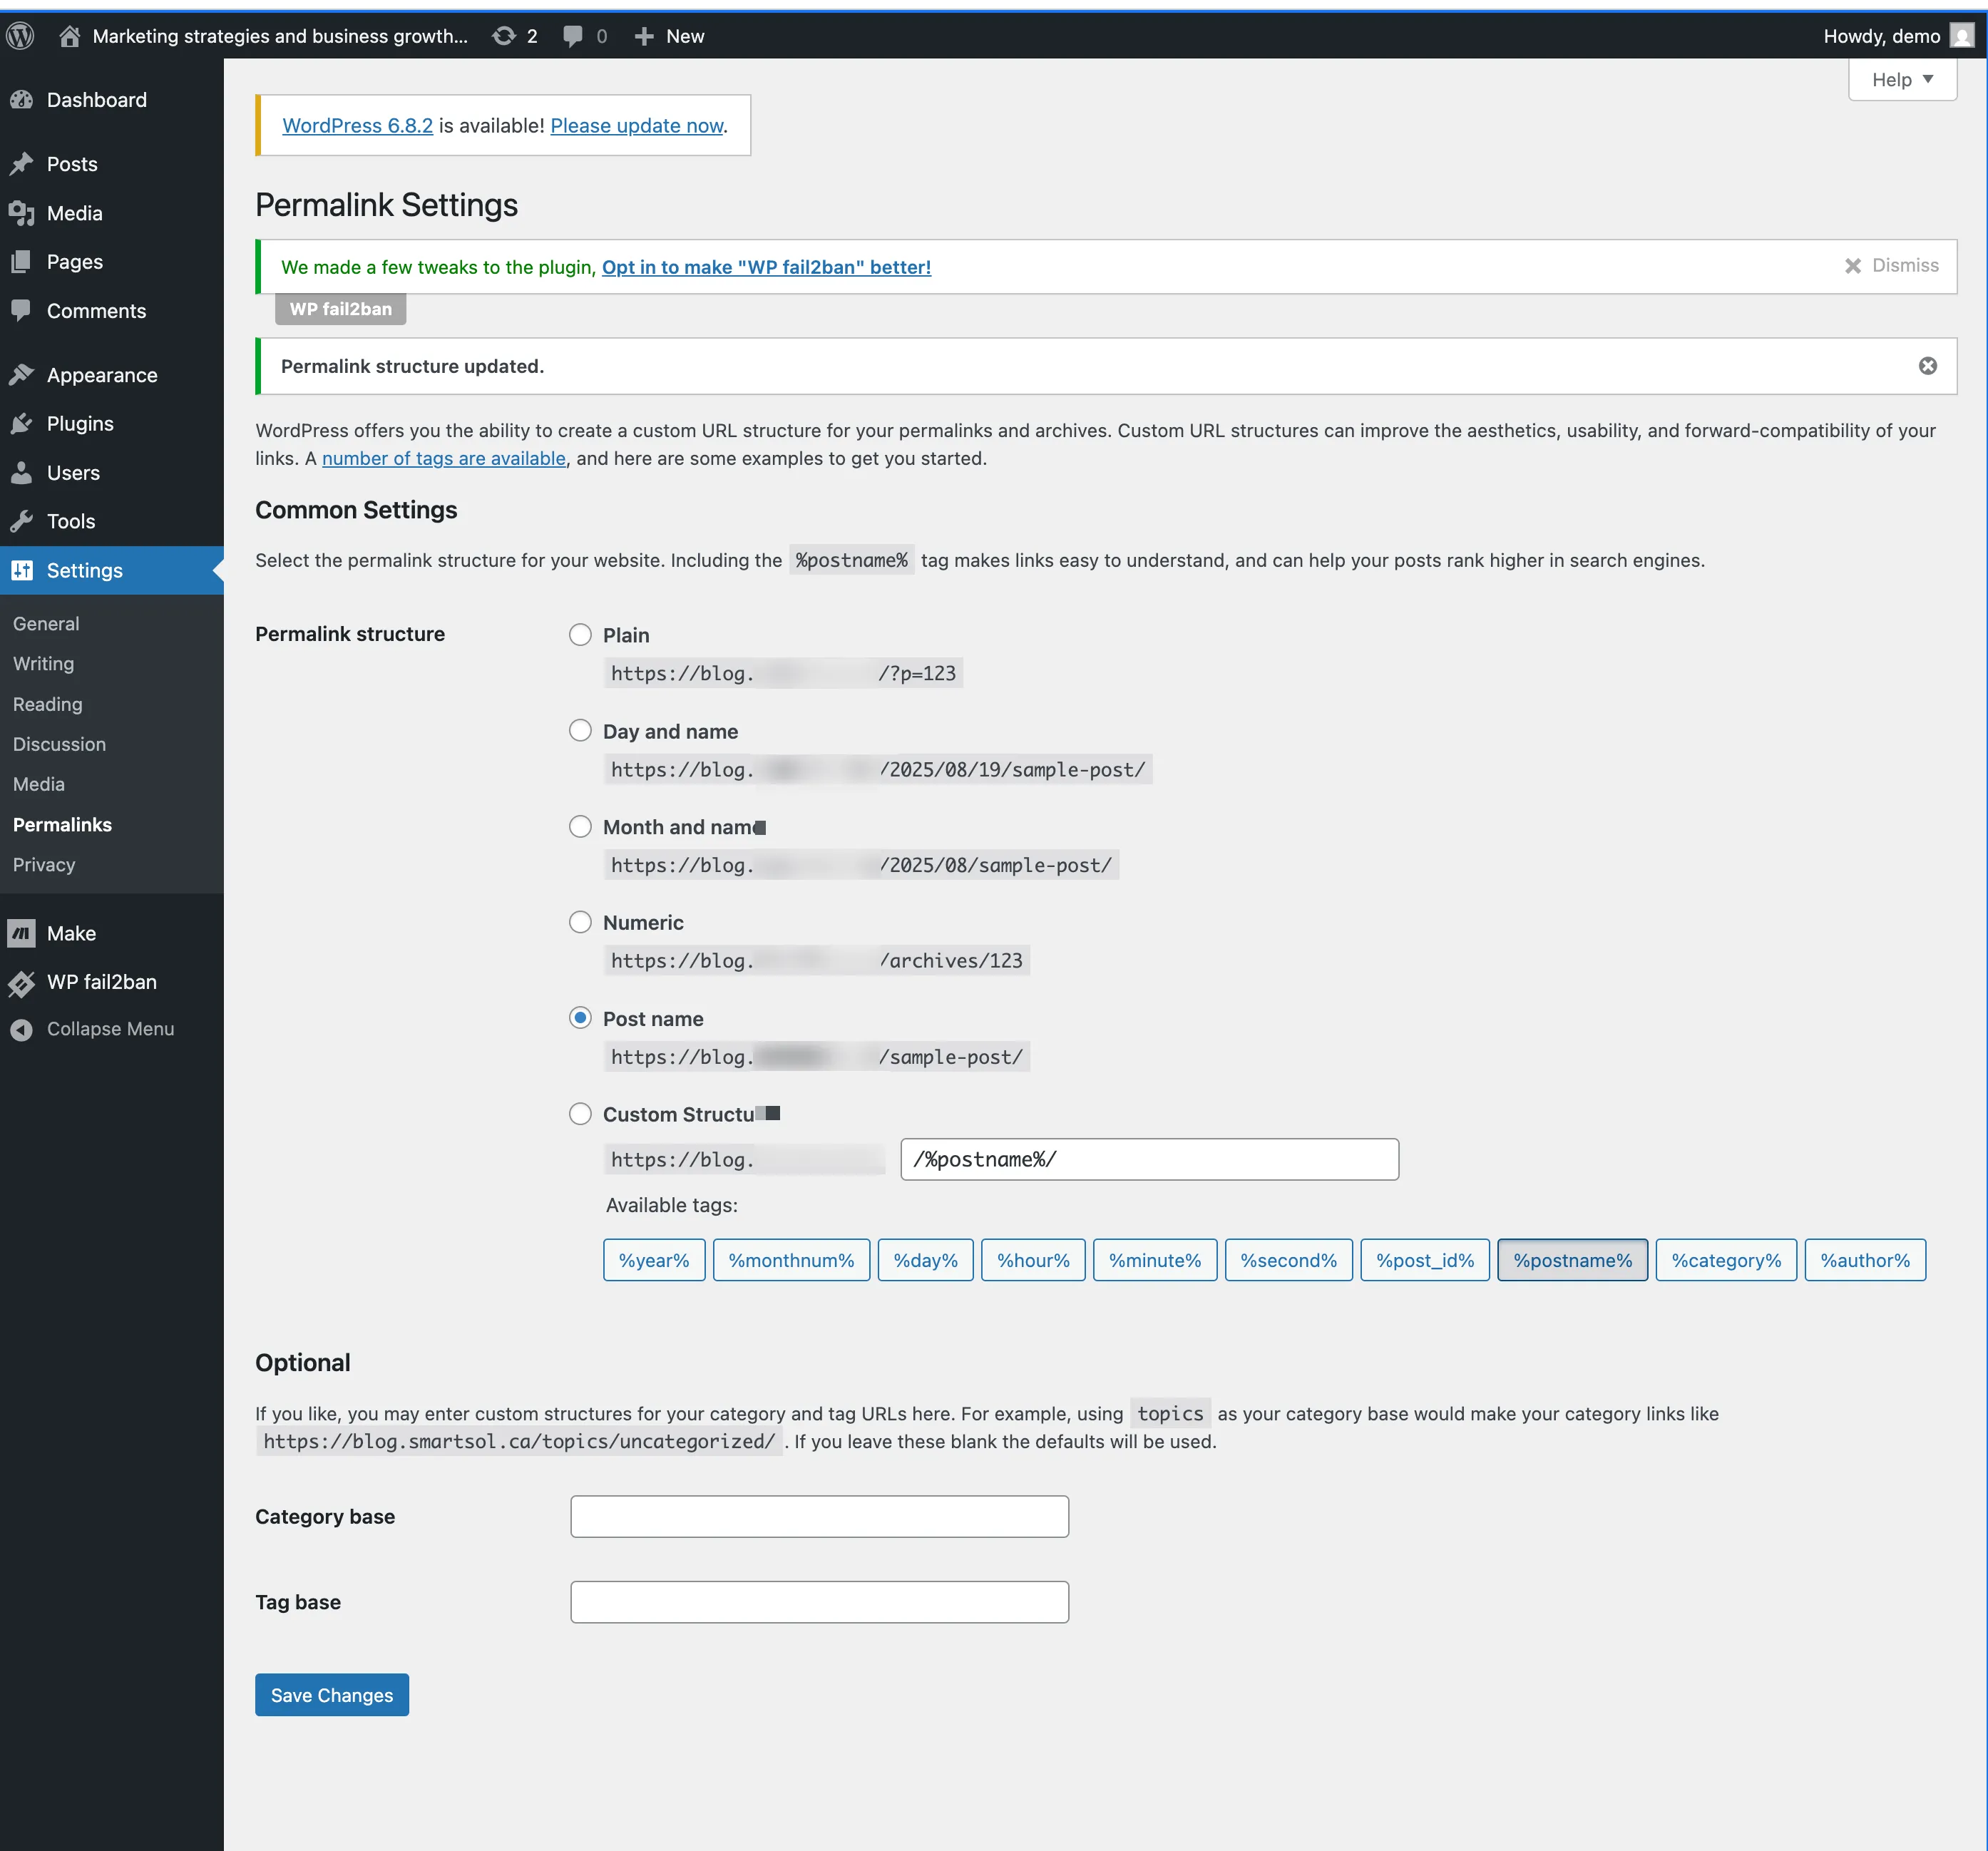
To confirm that the REST API is now working, open this URL in your browser: https://your-wordpress-site.com/wp-json/wp/v2/.
You should see a JSON response instead of a 404 error.
Once you see that the REST API works, return to Make and enter https://your-wordpress-site.com/wp-json/ in the WordPress REST API base url connection field.
Watch Posts, Search Posts, or Create a Post returns outdated or empty output
Make connects to WordPress through the WordPress API at the URL path /wp-json/. If a content delivery network (CDN), your hosting provider, or a caching plugin stores a copy of the WordPress API's responses, Make receives outdated or empty output.
Examples
- Watch Posts or Search Posts doesn't return recently published posts.
- Create a Post returns an error, and its output is empty, missing the post ID, or the post doesn't appear on your site.
- Error message: The WordPress REST API did not return a post ID. The post may not have been created. If a CDN or cache sits in front of the site, exclude /wp-json/ from caching.
Write requests (create, update, delete) must never be cached, as they need to reach WordPress.
To fix it, exclude /wp-json/ from caching:
In the CDN, the hosting cache, and any WordPress caching plugin, add a do-not-cache rule for any URL path starting with /wp-json/.
In each place you applied the rule, clear the cache.
Re-run the affected modules and check if results match what's on your site.