Snowflake
 | Snowflake is a cloud-based data platform that provides data storage, processing, and analytic solutions. With the Snowflake app in Make you can execute SQL commands and return results in your Snowflake account. |
|---|
Requirements
To use the Snowflake app in Make, you must have a paid Snowflake account. For subscription information, refer to the Snowflake pricing page.
Connect Snowflake and Make
Make provides three ways to connect the Snowflake app:
Establish a connection with username/password
To connect your Snowflake app with a username/password:
Log in to your Make account, add a Snowflake module to your scenario, and click Create a connection.
Optional: In the Connection name field, enter a name for the connection.
In the Connection type, select the type of connection - Snowflake key pair.
- Optional: In the Connection name field, enter a name for the connection.
- In the Account field, enter your Organization Name and Account Name that you copied above in Organization-Account format (e.g., if your Organization Name is ABC, and the Account Name is DEF > enter ABC-DEF).
- In the Username and Password fields, enter your Snowflake account's login credentials.
- In the Database field, enter the name of the database for which you are going to execute commands. To see the names of the current databases, in the left sidebar, click Data > Databases.
Click Save.
You've successfully created the connection and can now use the Snowflake app in your scenarios. If you want to make changes to your connection in the future, follow the steps here.
Establish a connection with a key pair
To connect your Snowflake app with a key pair, you need to obtain your account details in your Snowflake account and generate a private key. To do that:
Log in to your Snowflake account.
At the bottom left, click your account name icon > View account details.
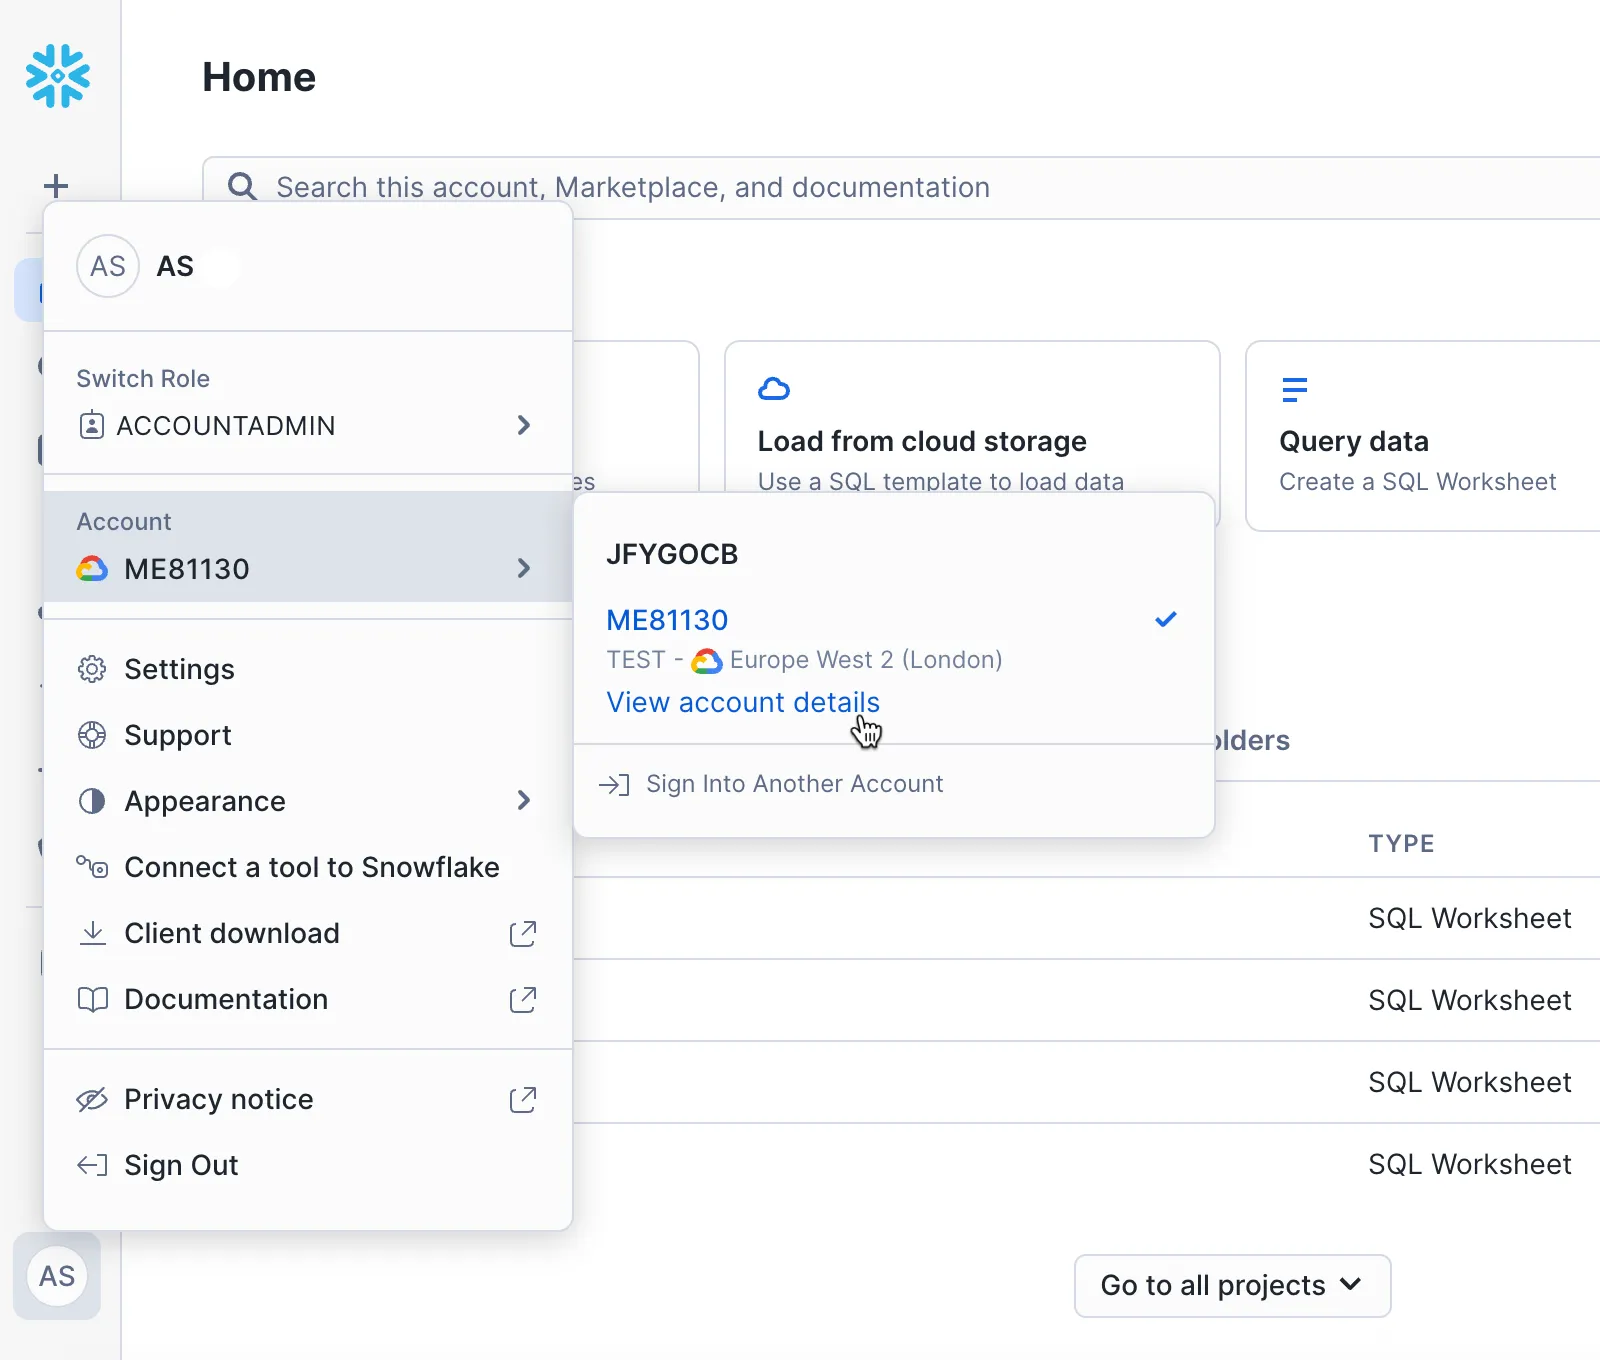
Copy the Account Name and Organization Name and store them in a safe place.
To generate your private key in your Snowflake account, refer to the Snowflake documentation.
You need to generate both public and private keys to successfully connect Snowflake in Make. Your public key is associated with your Snowflake account, and your private key connects Snowflake to Make. You may generate either an encrypted or unencrypted private key. If you generate an encrypted key, store your password in a safe place.
Log in to your Make account, add a Snowflake module to your scenario, and click Create a connection.
In the Connection type, select the type of connection - Snowflake key pair.
- Optional: In the Connection name field, enter a name for the connection.
- In the Account field, enter your Organization Name and Account Name that you copied above in Organization-Account format (e.g., if your Organization Name is ABC, and the Account Name is DEF > enter ABC-DEF).
- In the Username field, enter your Snowflake user login.
- In the Private key field, enter the private key you generated in your Snowflake account.
- In the Database field, enter the name of the database for which you are going to execute commands. To see the names of the current databases, in the left sidebar, click Data > Databases.
Click Save.
You've successfully created the connection and can now use the Snowflake app in your scenarios. If you want to make changes to your connection in the future, follow the steps here.
Establish a connection with an OAuth
To connect your Snowflake app with the OAuth client credentials, you need to obtain your Client ID, Client Secret, and Account Identifier in your Snowflake account. To do that:
Log in to your Snowflake account.
You need an ACCOUNTADMIN role or a role with the global CREATE INTEGRATION privilege.
To obtain the client credentials, you need to create a security integration:
- In the left sidebar, click the + icon > SQL Worksheet. This is where you can write and execute SQL queries.
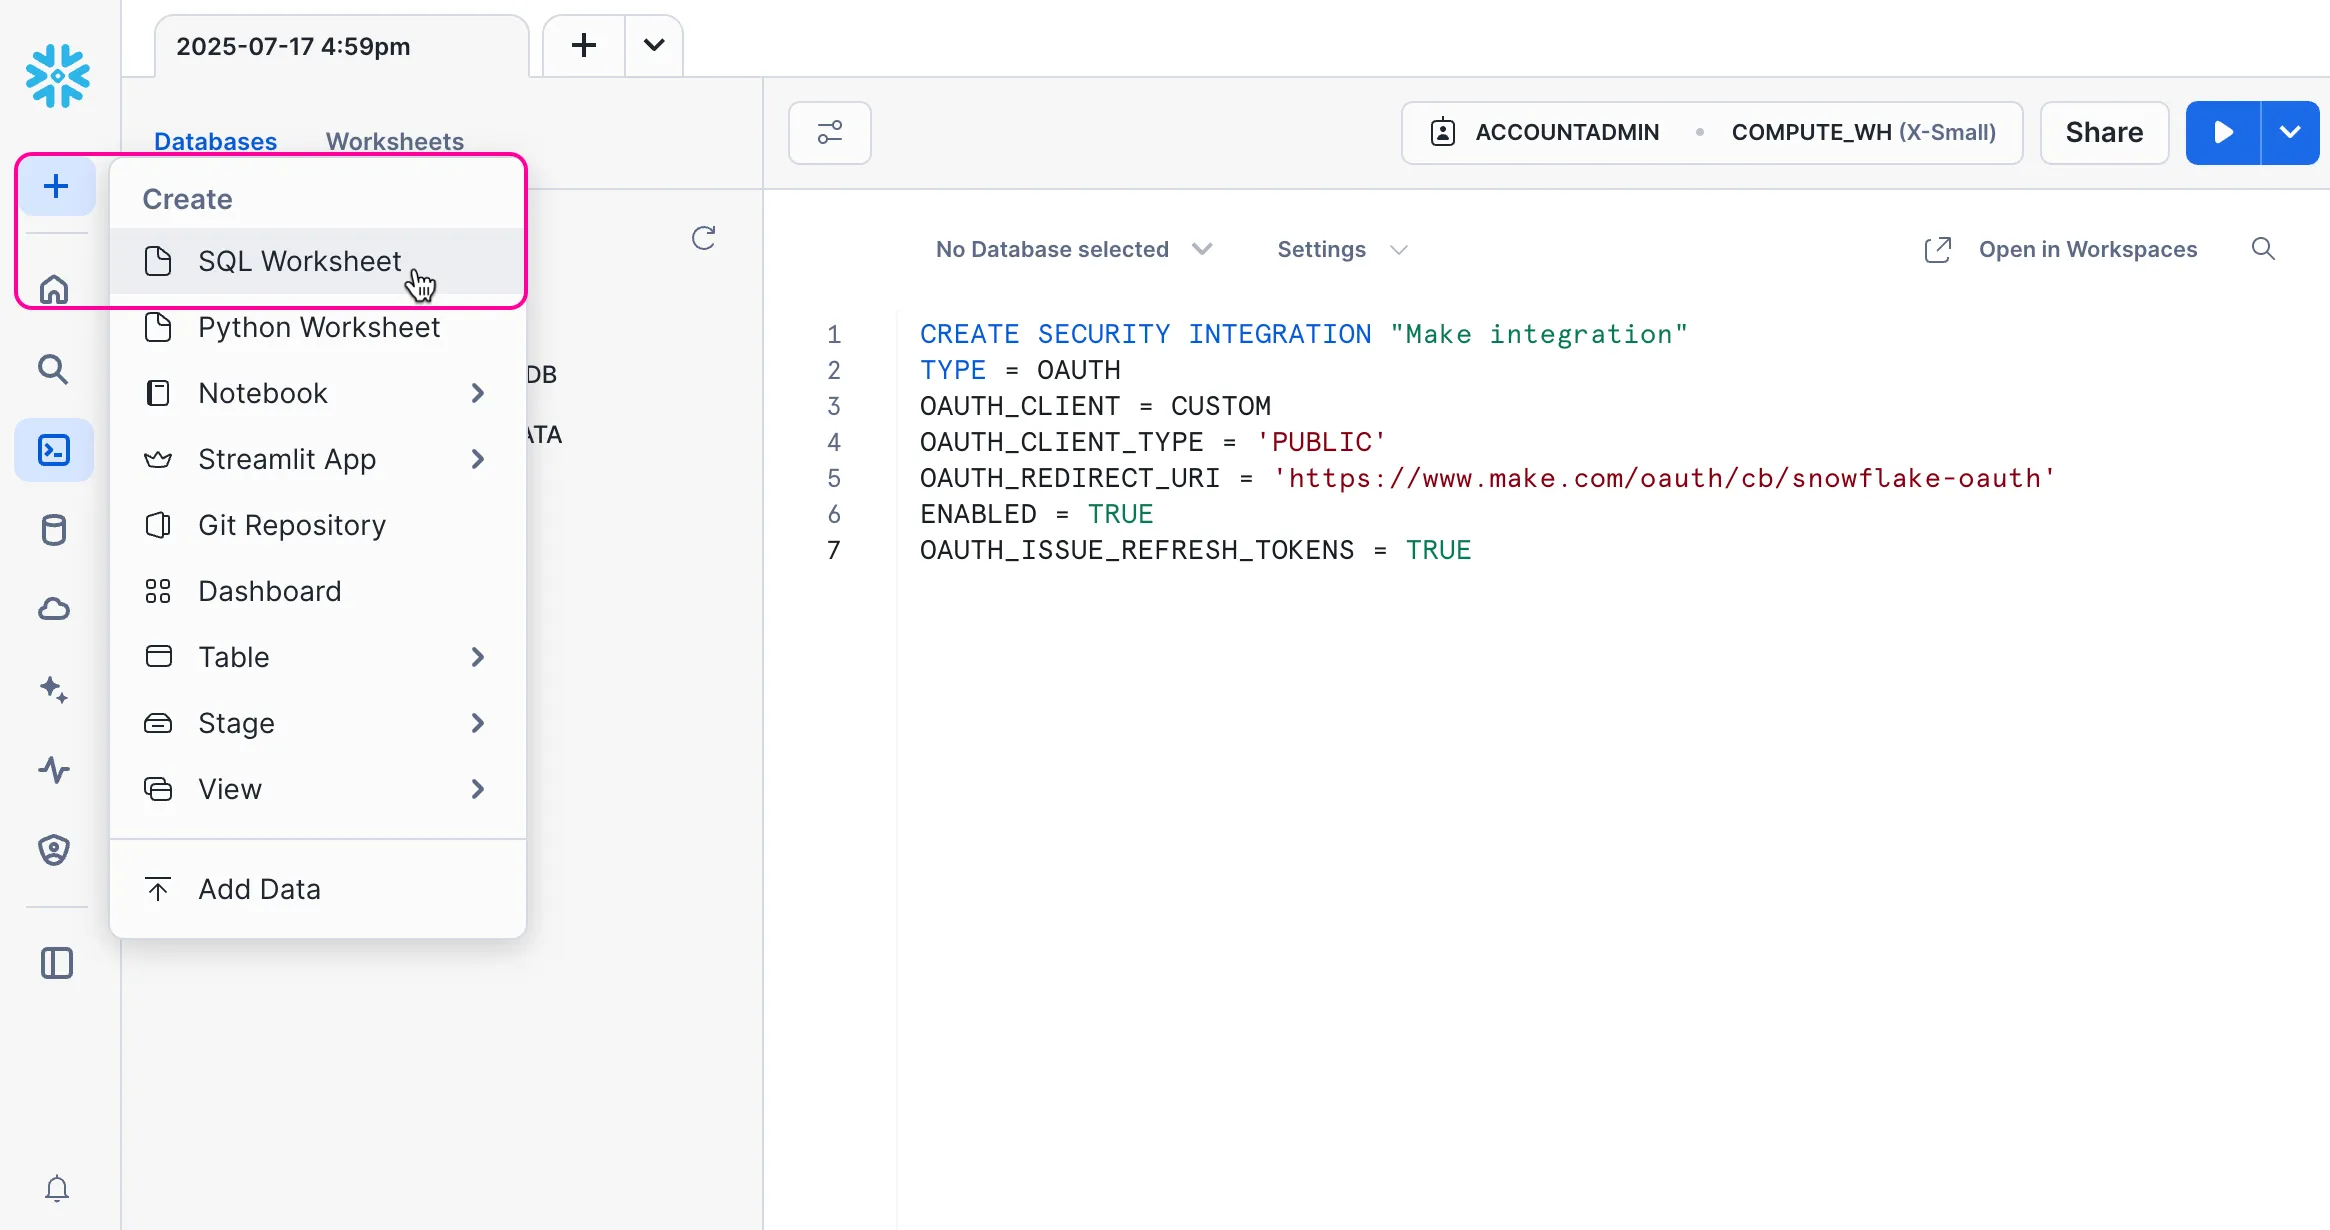
- Create an integration for a custom client. Here's an example of the SQL statement:
- Click the Run button in the top-right corner to execute the command and create the security integration. Make sure the statement is executed without errors.
This is a minimal set of data to specify prior to the query execution. For additional details and configuration options, refer to Snowflake OAuth documentation.
To view the complete configuration of the app you just created, use this SQL statement: DESCRIBE INTEGRATION "your integration name";
To let users with privileged roles create a connection, execute the following SQL statement: ALTER ACCOUNT SET OAUTH_ADD_PRIVILEGED_ROLES_TO_BLOCKED_LIST = false
To retrieve the OAUTH_CLIENT_ID and OAUTH_CLIENT_SECRET, run the following SQL query:
After executing the command, you will see a JSON string at the bottom of the worksheet. It contains your OAUTH_CLIENT_ID, and OAUTH_CLIENT_SECRET.
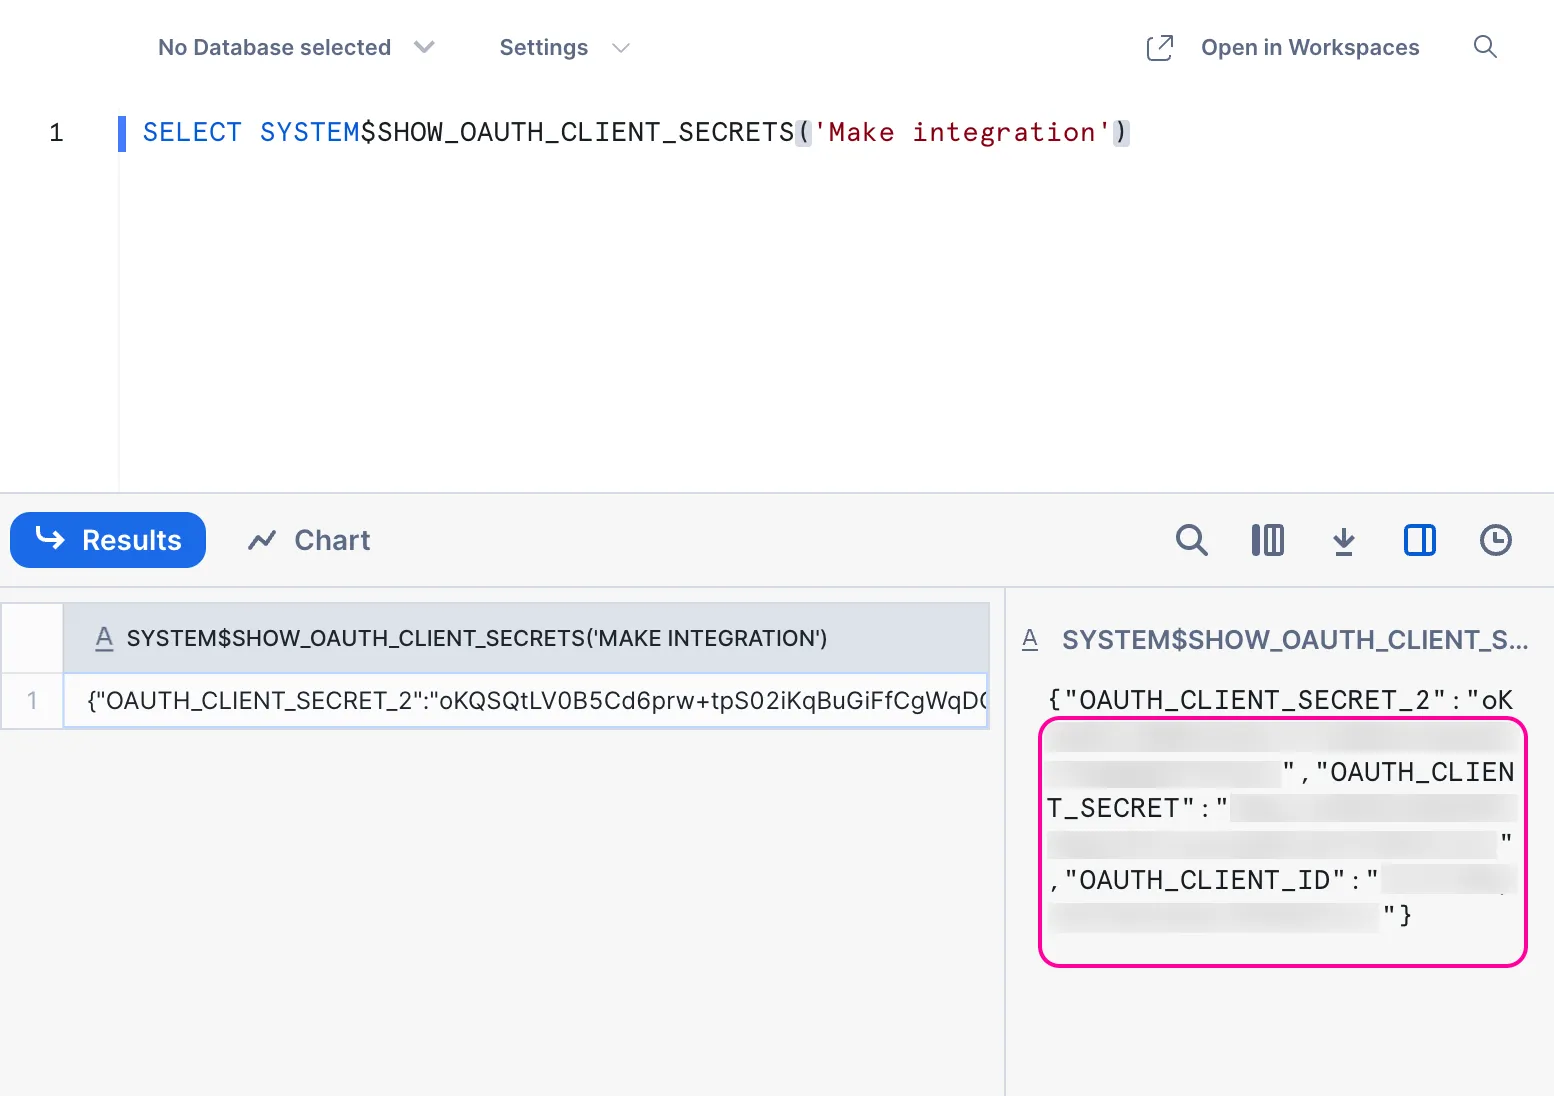
Copy the OAUTH_CLIENT_ID and OAUTH_CLIENT_SECRET, and store them in a safe place.
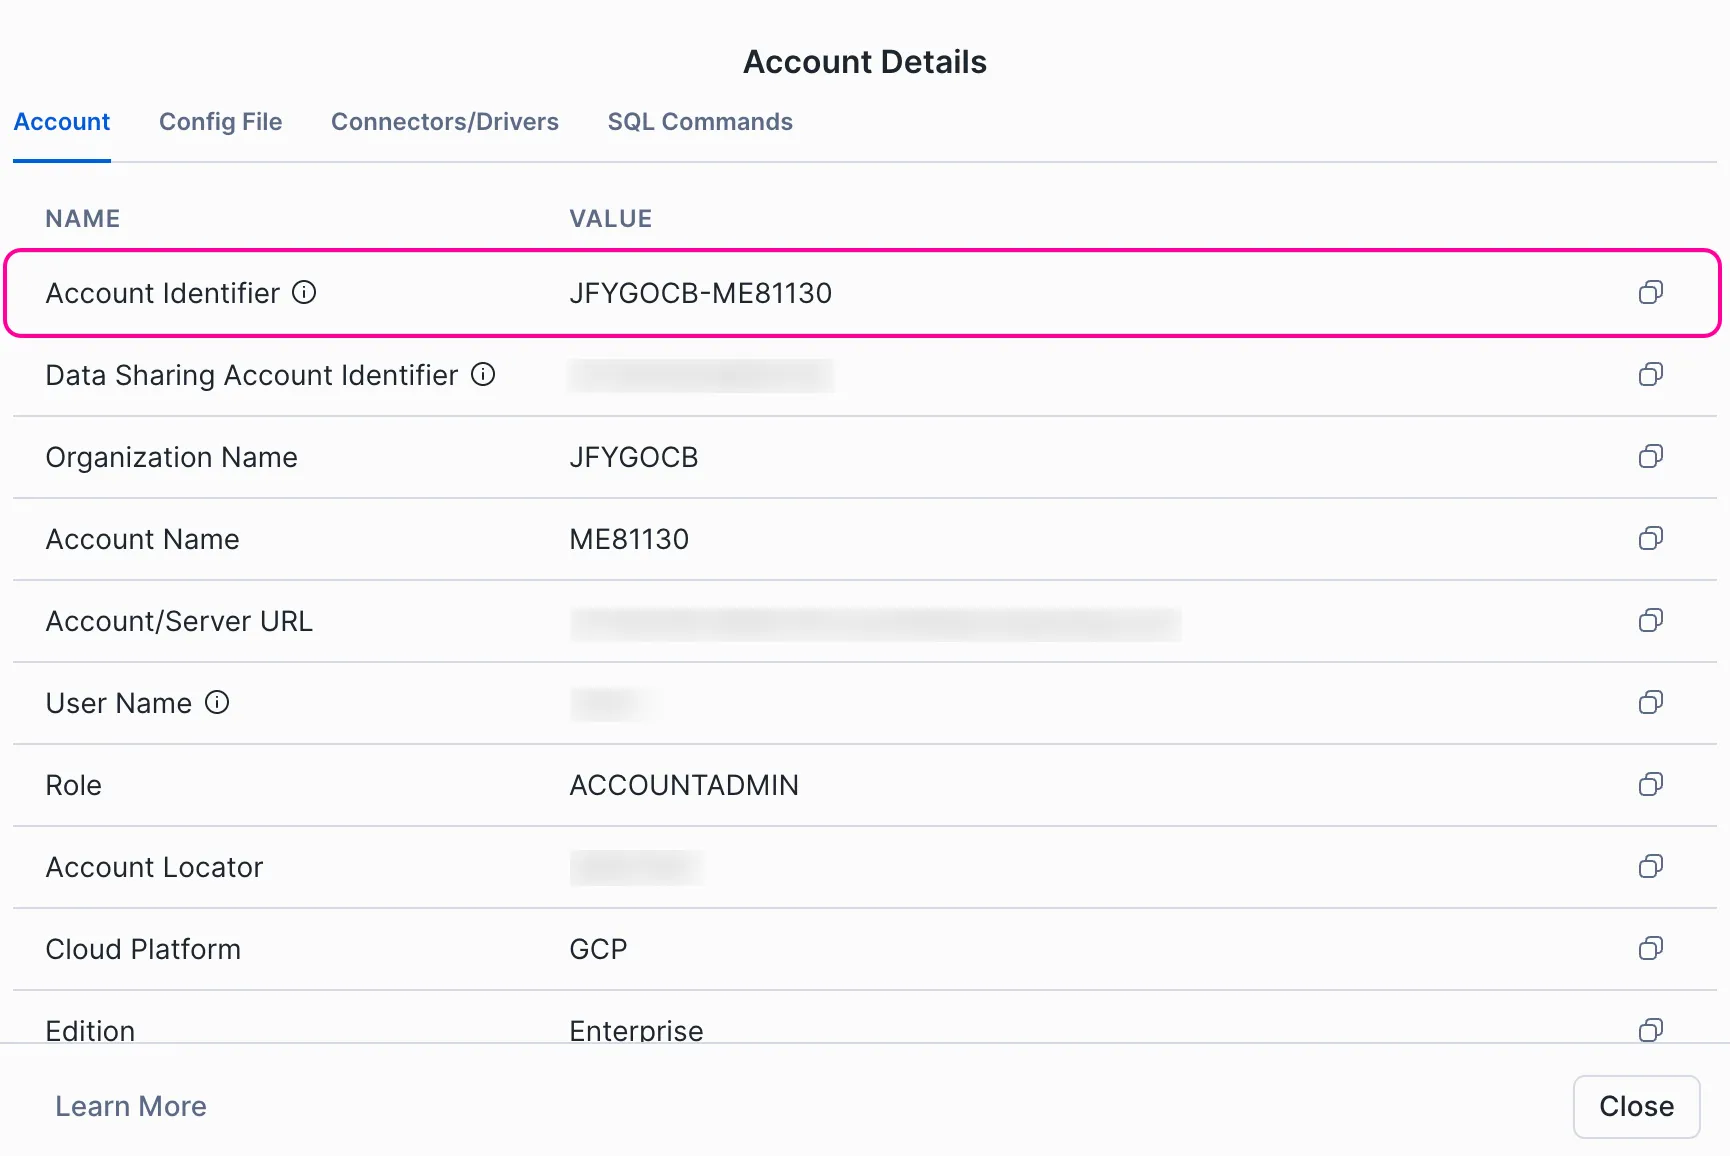
To obtain the Account Identifier, click your account name icon > View account details.
Copy the Account Identifier and store it in a safe place.
Log in to your Make account, add a Snowflake module to your scenario, and click Create a connection.
In the Connection type, select the type of connection - Snowflake OAuth.
- Optional: In the Connection name field, enter a name for the connection.
- In the Client ID field, enter the OAUTH_CLIENT_ID you copied in Snowflake.
- In the Client Secret field, enter the OAUTH_CLIENT_SECRET you copied in Snowflake.
- In the Account Identifier field, enter the Account Identifier that you copied above.
- In the Database field, enter the name of the database for which you are going to execute commands. To see the names of the current databases, in the left sidebar, click Data > Databases.
Click Save.
You've successfully created the connection and can now use the Snowflake app in your scenarios. If you want to make changes to your connection in the future, follow the steps here.
If you switch from one authentication method to another, you can create a new connection with that authentication method and then replace the old one in all scenarios where it’s used. See the instructions here.
Snowflake modules
After connecting to the Snowflake app, you can use the following types of modules to build your scenarios.
Templates
You can look for Snowflake templates in Make's template gallery, where you'll find thousands of pre-created scenarios for different apps.